Jul 18
Reiher
Step by step for creating a city background
Hello everyone, players!
Here Alfonso Berroya, the art director of this adventure. If you have had the opportunity to test the game or if you have come this far as fans of the artistic branch of video games, you may have wondered how city backgrounds are created in this type of game.
At first glance it seems like a simple job, but we will soon see what we had to do to get from the initial idea to the final art.
(You know, working overtime, bringing us the mattress and survival food to the studio and things like that).
Phase 1 – The idea
To begin the development of the background, we started from the concept that the Game Designer (our beloved leader) gave us, in which we had to represent the view of a city of the 8 civilizations available in White Spell, so we chose the one we believed would be easier to start “Empire”. A civilization of humans of an Asian-feudal style, linked to the philosophy of martial arts.
Documentation
Immediately afterwards, the entire art team began the DOCUMENTATION phase (yes, I put it in capital letters because since I came across some of you who work without documentation… I leave it to your imagination).
References
In this way, we immerse ourselves in the web in search of Japanese, Chinese and Korean architectural and cultural references, among others. In fact, it is not only important to reach a consensus in the art team on what the morphology of the final architecture is, but also to understand the psychology of civilization. To do this we had to define what their beliefs were, mythological beings or gods they believed in, language, philosophy of life, way of dressing…
And as if defining the psychological aspect of an entire civilization were not enough, we realized that we could not stop there, since some of the characteristics we proposed fit better for other civilizations. So if we didn’t want to mess around and have to redesign them later, it was best to define them all from the beginning, so they would all have their own personality without the others stepping on any of their basic characteristics.
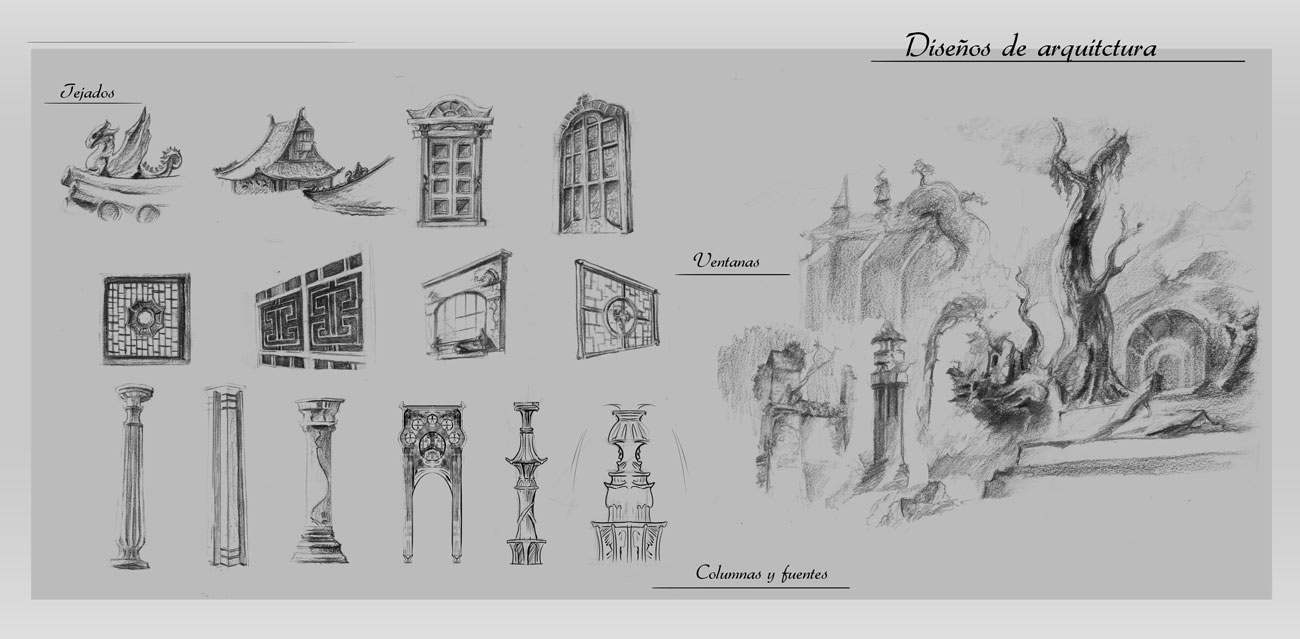
Fig 1. In this figure we can see some of these designs and exploratory sketches.
Once the architectural lines were decided in general terms, as well as the culture that characterized the civilization, we were able to begin to develop the first buildings, whose creation process will be seen in more detail in future chapters.
Be that as it may, at that time we needed a first color concept to serve as a guide to what the background of the city of the “Empire” civilization could be like.
The first concept
To do this, we turned to Joel Uriarte, a concept artist who worked in the first stages of the video game, to give us a first vision of the background.
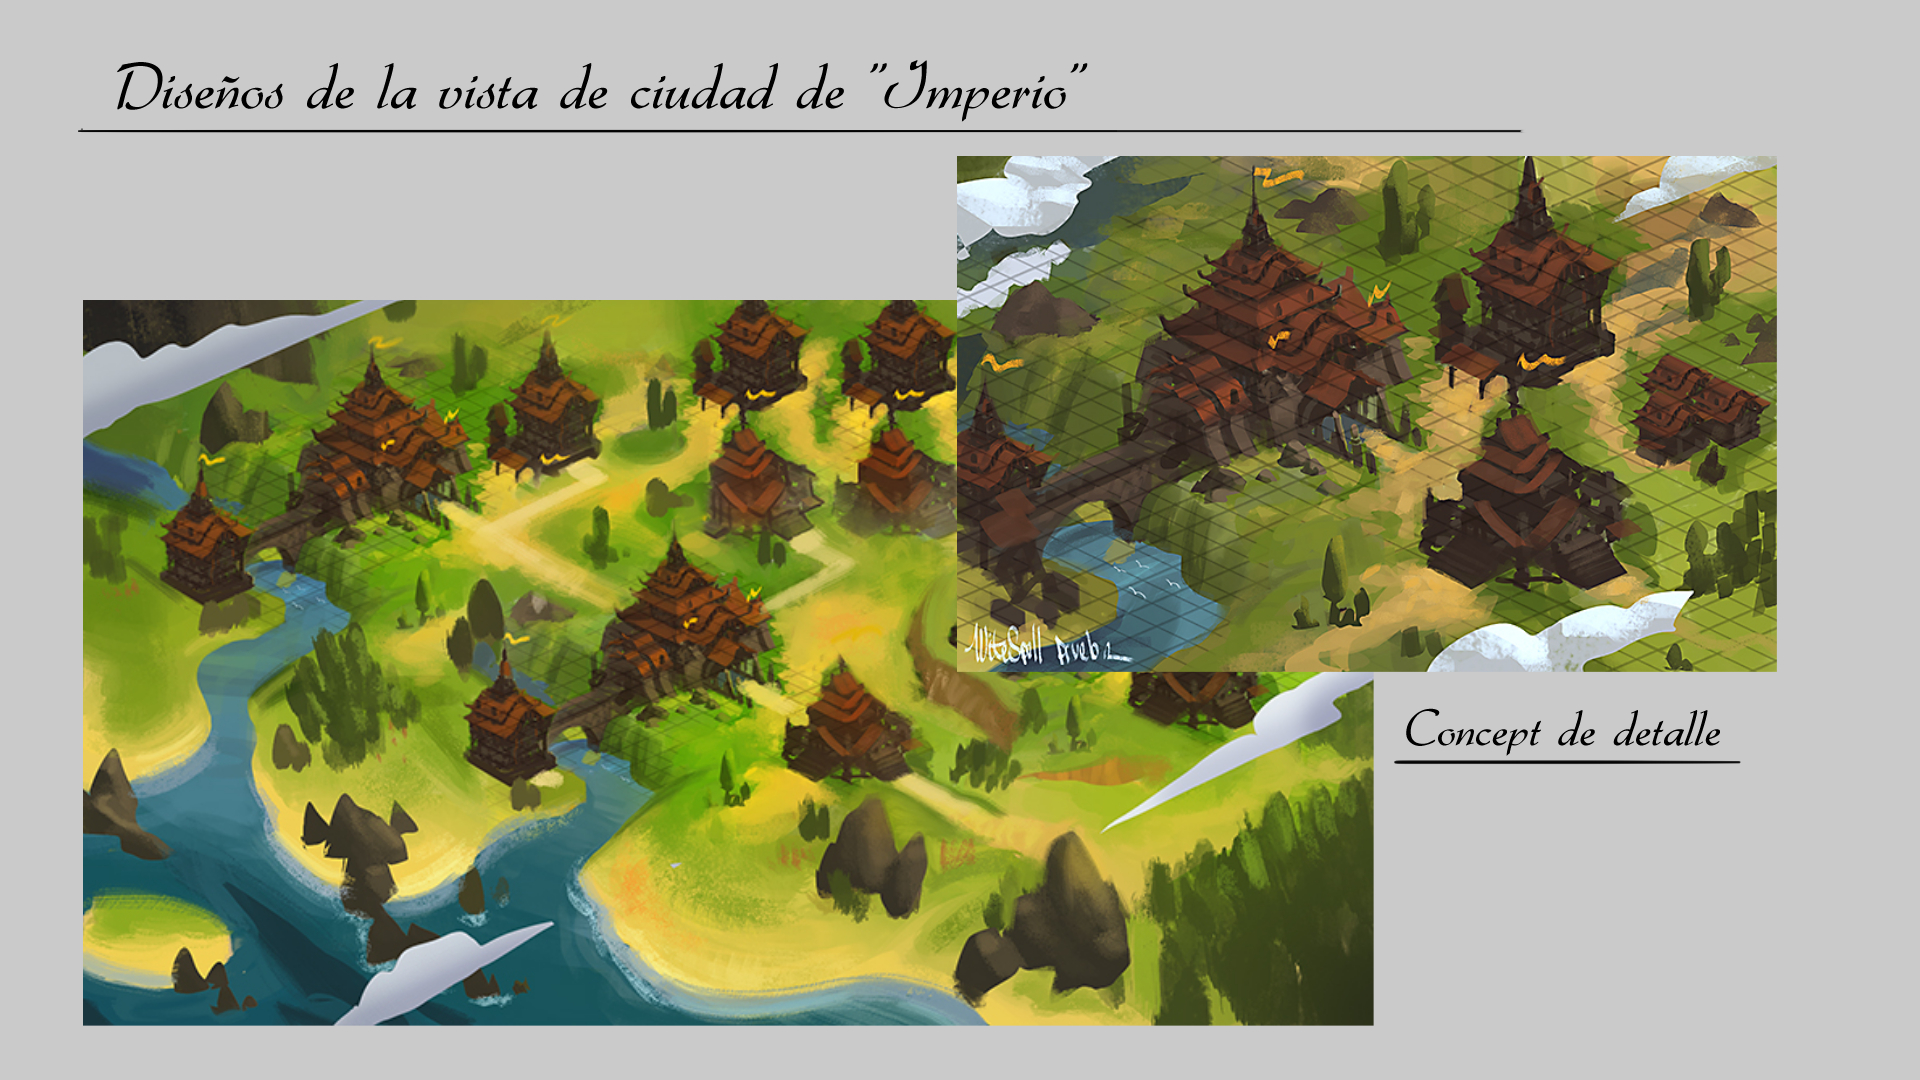
Figure 2, concept art of the city view of the “Empire” civilization..
Phase 2 – The prototype
Prototype and evolutions
We immediately saw that the aesthetic line worked, but we had to stick to tight times, so, based on this concept, a first prototype of the city background was developed by Egoitz Pinto. In this first prototype, fifteen buildings were developed with three evolutions each, in addition to the fund itself, which had three main evolutions.
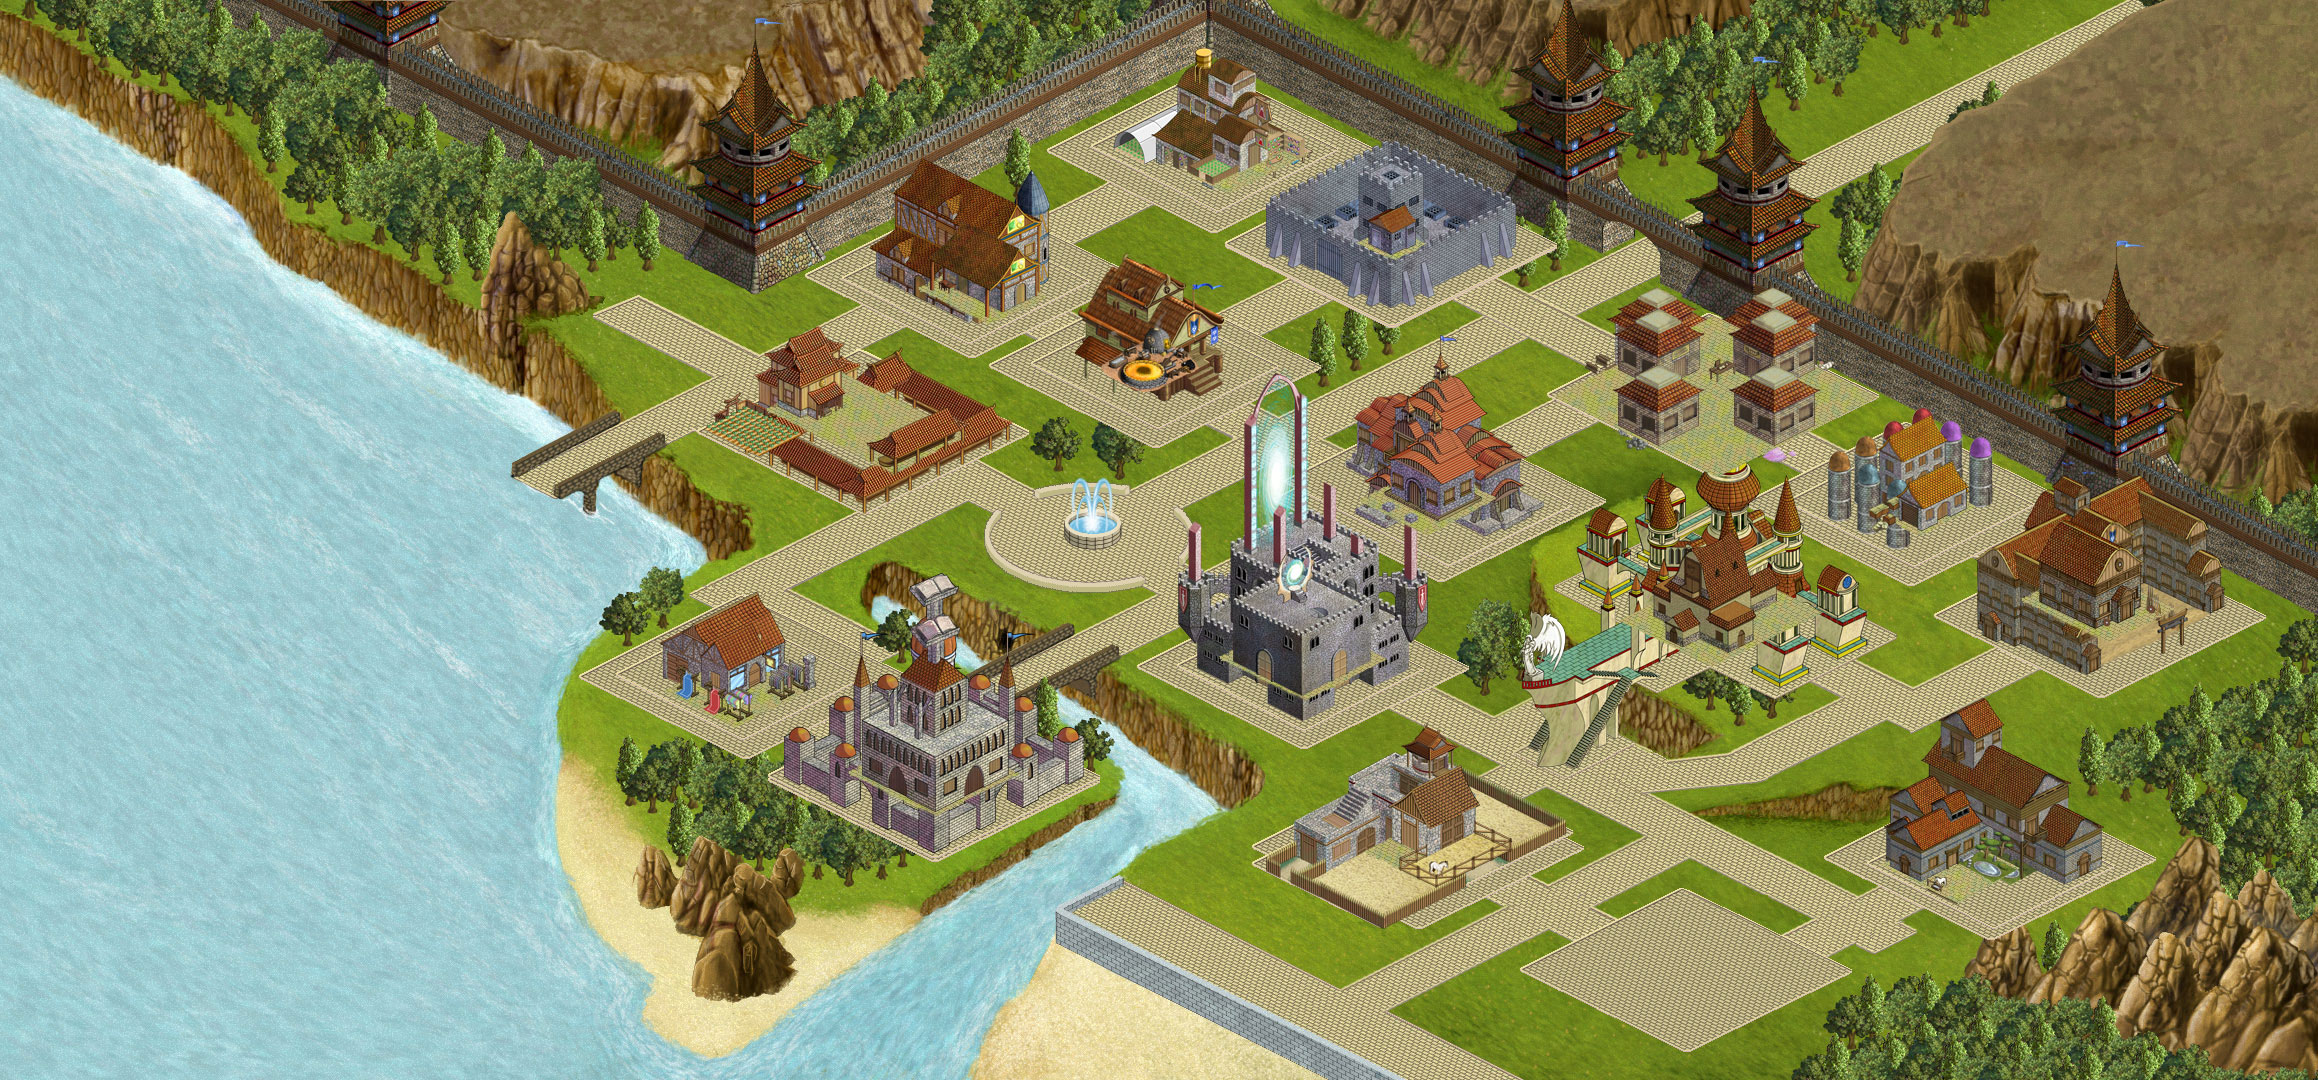
Figure 3, 2D art as a city prototype.
This work was done in record time (thanks Egoitz), nothing less than a little more than a month and a half of work, and it raised all those things that could fit and all those that were going to pose problems for us. One of the first decisions we made was that if we wanted to preserve the beauty of the city, we had to limit the arrangement of buildings in the city view. To do this, we had to move away from games where you have complete freedom in their placement because this way you spend almost all your time managing the space of your city and you end up cramming all the elements into the smallest space possible.
In this way, in addition to preserving the artistic aspect of the city, we also got the player to focus on managing their resources, their armies and their investigations, which was exactly what we wanted.
Phase 3 – Development
The team united in a physical space
After two long years of prototyping phase and under very unfavorable conditions we obtained financing. This injection of resources gave the project the push it needed. The entire team was able to start working in the same studio full time, and we began to take a second look at the material we had produced, giving it more care and quality (you know, if you want it to be cool, you have to give it a try).
So we got to work, and began to rethink the design of the city, taking elements from the proposals of both Joel and Egoitz, but trying to improve the finish both in detail and legibility for the player.
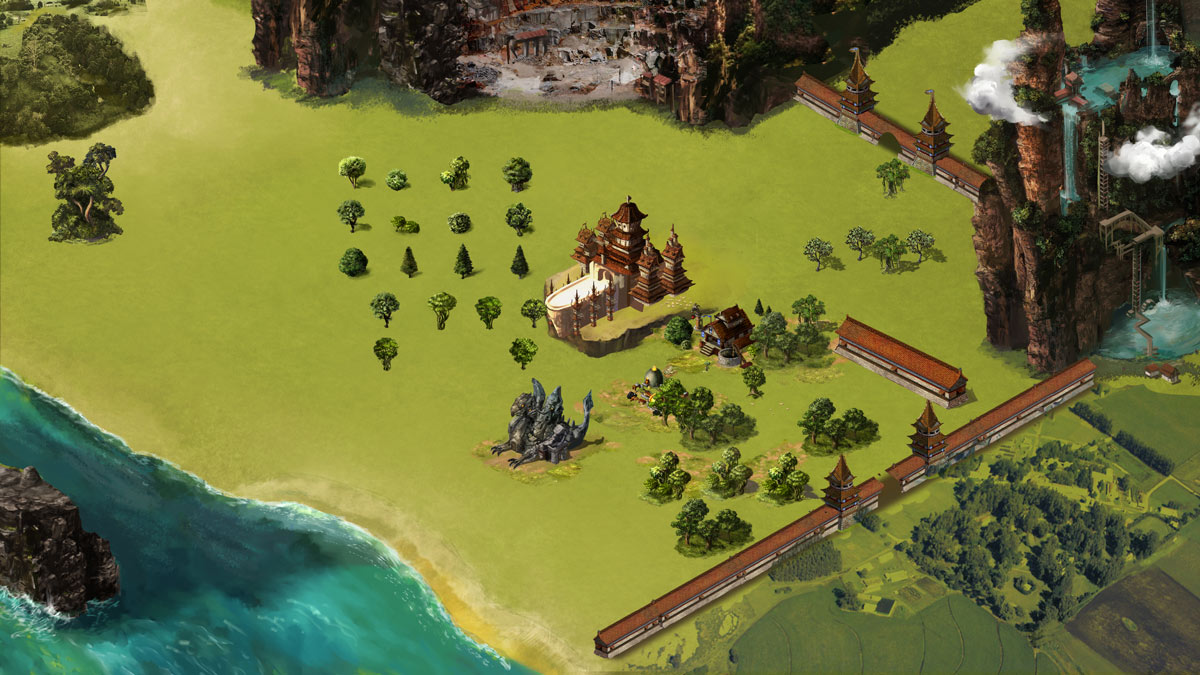
Figure 4, development of the background and exterior props.
At this point in the development, we begin to outline the shapes of the mountains and cliffs at the ends. We also created sets with the new trees we were designing (you can see some textures on the sides, which only served to compare tones and suggest ideas).
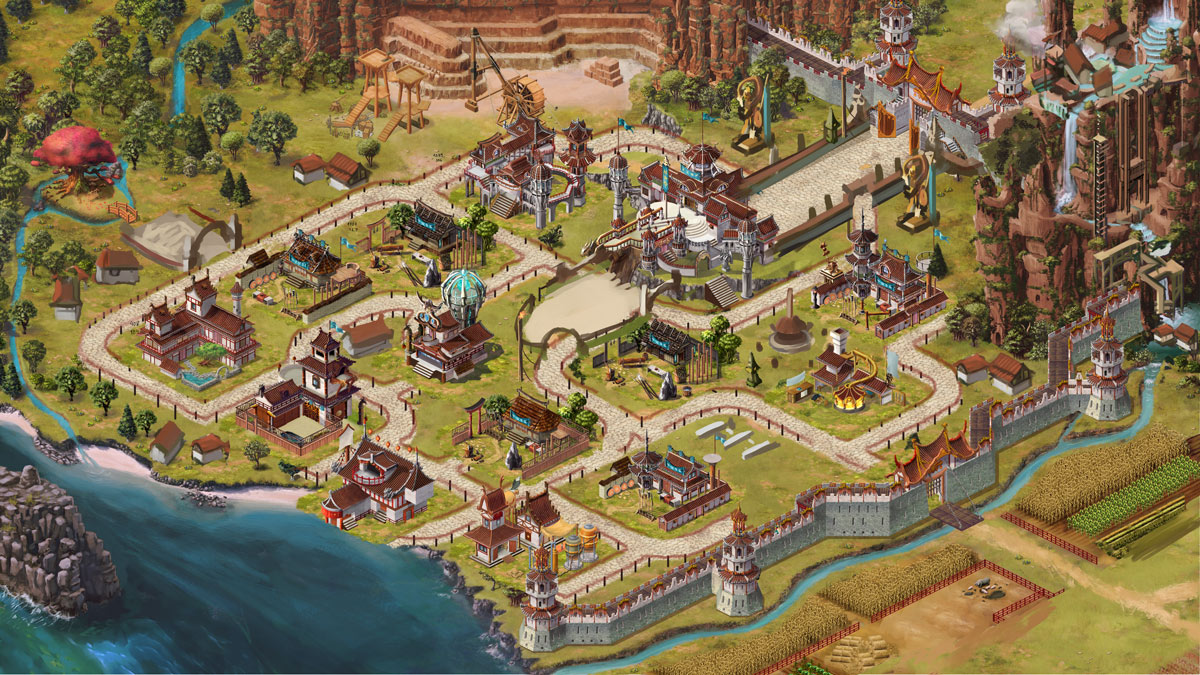
Figure 5, layout of holes, bottom improvement and road development.
Teamwork
As the work progressed, the changes occurred with greater intensity, lengthening the final resolution of the city’s background more and more in time. For this reason, Diego Román and I had to exchange positions several times during its development to be able to handle other tasks that also required our attention. This helped everyone contribute their vision to the final finish and strengthen the bonds of teamwork.
One of the tasks that had to be repeated the most after having decided the final positions of the openings of the buildings in the view, was to join them with paths that would grow and change as we grew our city.
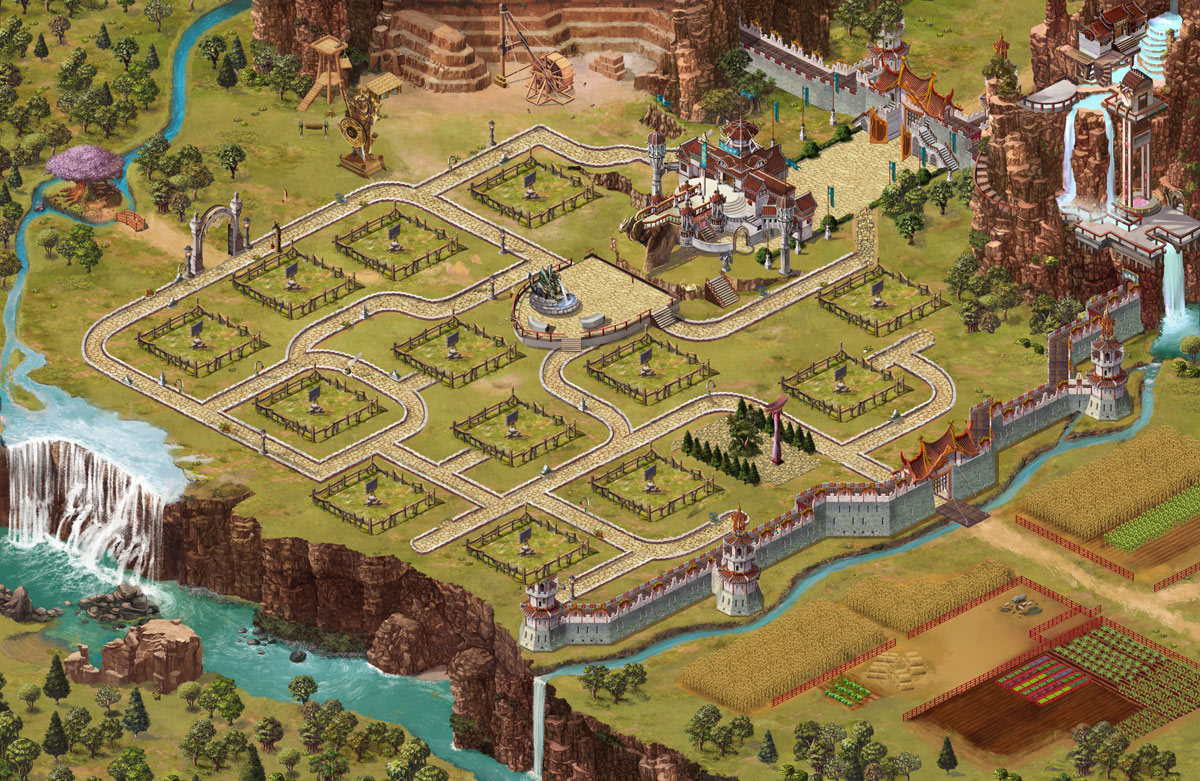
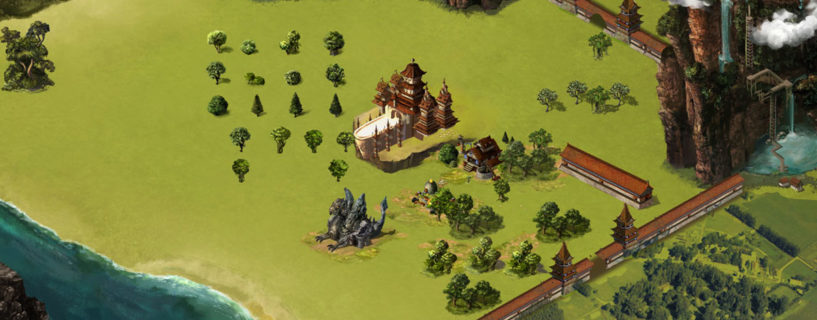
Figure 6; definitive background of the city of “Empire” in its final evolution.
We have to remember that both buildings and background have eight different evolutions. Thus, figure 6 represents the definitive background of the “Empire” in its final evolution. As you can see, we have changed the sea area for a cliff. This is due to a change in gameplay as we moved most of the players’ cities inland, leaving port cities for later.
For the art team, the work ended here.
Phase 4 – Implementation
Or so we thought, but Jonathan (who in addition to being our beloved leader is also our programmer) saved a surprise for us for the end. If we wanted all the information we generated in the previous phases to be properly constructed in the game, we had to use a coordinate system and assign a loading priority to each element that would allow each piece to be reassembled on the city view without surprises.
What was intended to be solved was the correct superimposition of the elements so that we would not have a building stepping on a prop of trees or that the wall would be carried over a mountain.
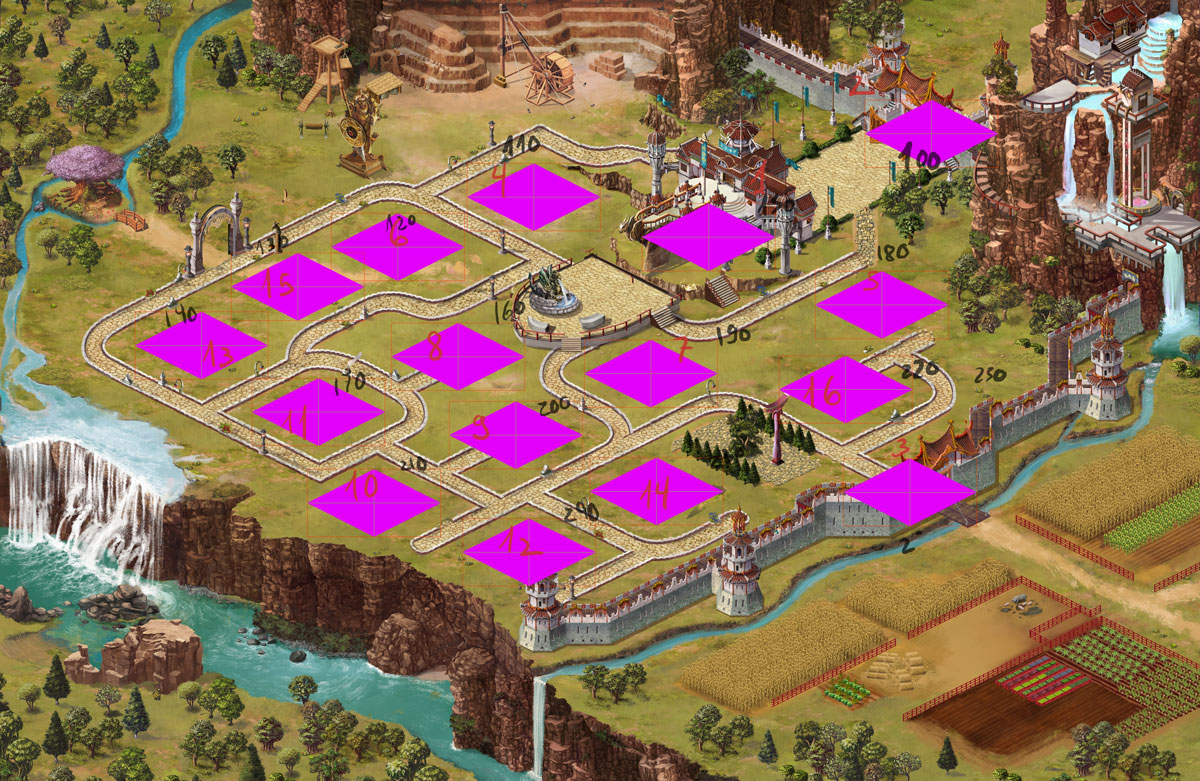
Figure 7; layout of building openings and their priority code.
At first this was a bit confusing to implement (imagine our faces when the matter was explained to us), but you always have to be willing to learn new things, even if you have to suffer a little.
In figure 7 you can see my annotations. The numbers in red are the priority codes, which indicate the order in which the spaces are unlocked as the city grows. The numbers in black indicate the position in which the elements are loaded on the Z axis of the coordinate system, thus avoiding superposition problems. For example, if there are trees very close to a hole, it is better to assign them a lower priority code than the hole itself. In this way, by placing the building over this gap, the building will visually “step on” the trees behind it and not the other way around.
Question of priorities
In figure 7 what we see is the arrangement of the spaces in the order in which the player unlocks them (they are the numbers in red). Thus, certain background props would be present whether or not there were gaps unlocked, because if you didn’t do it carefully, you could see trees appearing over gaps in buildings. Therefore, in addition to knowing that in certain evolutions there are more or fewer gaps and therefore, fewer props in those areas, it was necessary to control the priority code (represented in the numbers in black) to make certain elements logically above others. . For example, if there are trees very close to a hole, it is better to assign them a lower priority code than the hole itself. In this way, by placing the building over this gap, the building will visually “step on” the trees behind it and not the other way around.
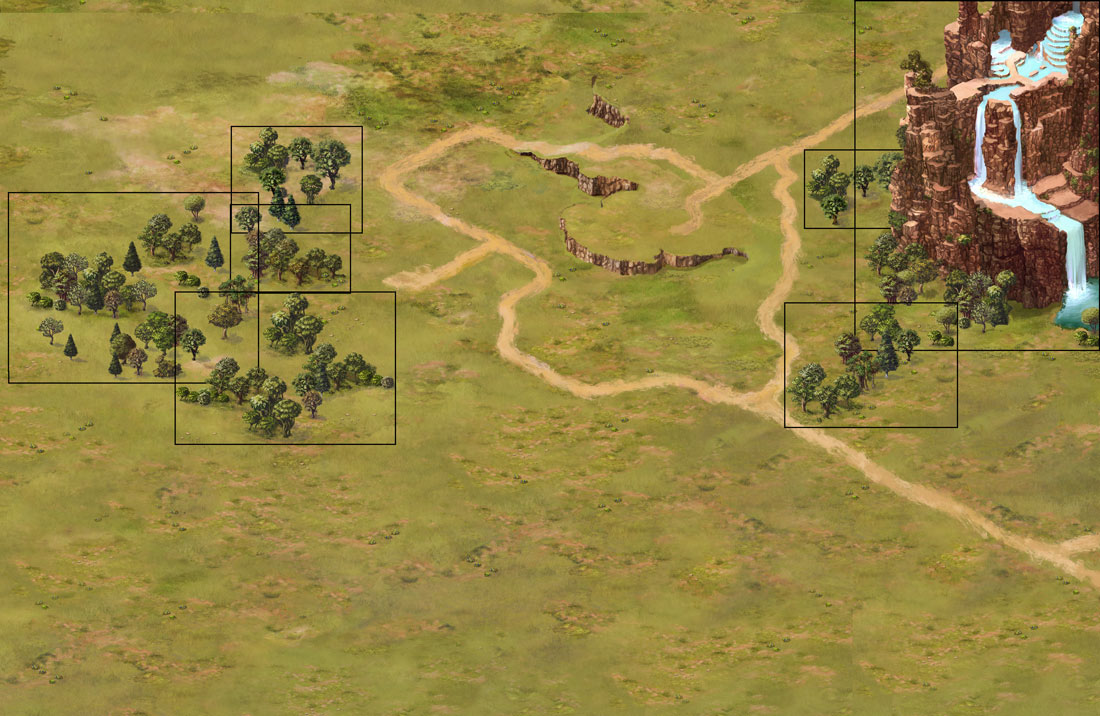
Figure 8; example of floor props, with their measurements in “X” and “Y” ready to send.
For the most curious, our coordinate system consisted of counting the number of pixels from the upper left corner of the background to the upper left vertex of the rectangle that encompasses the prop we wanted to place. This measurement is always taken on the entire canvas where the image goes, because otherwise it would be useless for the programmer.
Well, you see, developing the background has been a very long and complicated job, not only in concept and illustration, but also in planning and organization.
We hope you found it interesting (although this last part surely seemed very cumbersome), and stay tuned, because soon we will upload more documents to the developer diary, so you can see first-hand how we have worked on this project.
Thank you all!
Alfonso Berroya
White Spell Art Director